COVID-19 has changed our world, and has forced us to rearrange our lifestyles and adopt new habits. Every aspect of our lives has been affected, from the way we work to the way we shop for groceries. Naturally, the pandemic has also challenged the way we teach academic courses. Even in the post-COVID 19 world, it’s clear that online learning is here to stay. It has many advantages, to be sure, but one must not neglect Zoom security issues.
Zoom is up for the challenge. The Zoom platform allows lecturers to provide their students with seamless video and audio interaction. Efficiency aside, Zoom is also helping keep academic classes super-secure.
Zoom Security Features for the Academic Classroom
Zoom doesn’t settle for less than the perfect meeting, even when the meeting is actually a class. When it comes to virtual classroom security, Zoom has an abundance of features that provide optimal peace-of-mind. In this article, we have compiled a few practical tools that will help lecturers create a safer learning environment. Here’s what you need to know about Zoom security and the virtual academic classroom:
Schedule Your Class Responsibly
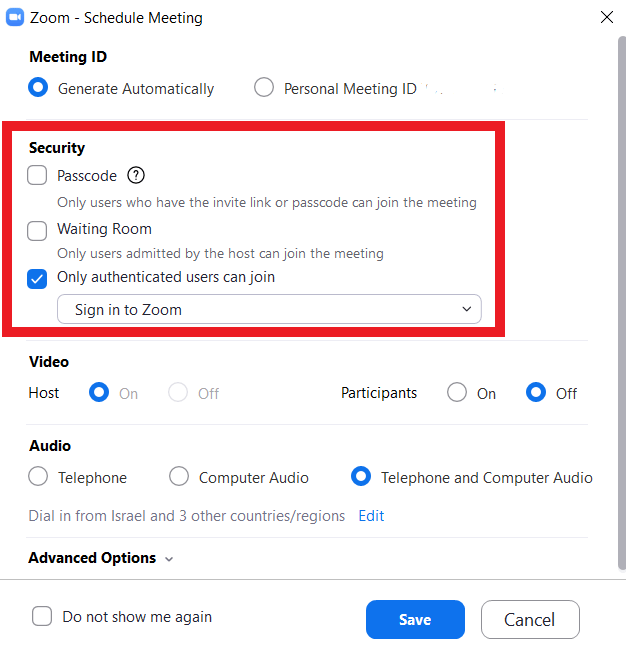
Zoom security features provide many crucial scheduling and registration options that can help keep your class safe. These include:
- Passcode protection for that prevents anyone without the proper passcode to enter.
- User authentication is an important feature that allows only users with Zoom accounts and vetted email addresses to join your class.
Lock the Classroom Door
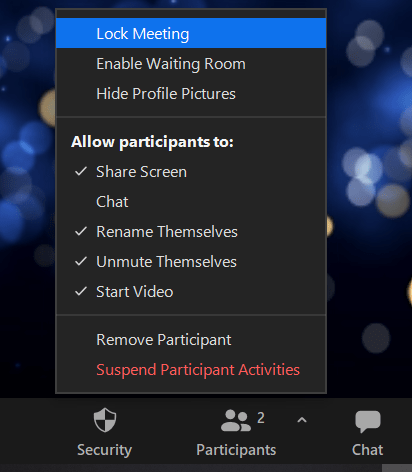
Want to make sure no one enters your virtual classroom uninvited? All you have to do is click on Zoom’s Security icon, which is located at the bottom of your meeting screen. Once you click, a dropdown menu will appear. On the menu, select “Lock Meeting”. Just make sure that all your students have signed in first, so you don’t lock them out by accident.
Use the Waiting Room Feature
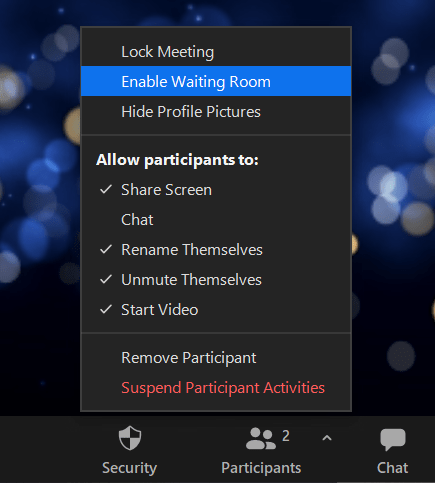
The waiting room feature is a key Zoom security component. When you enable the Waiting Room, every participant who logs into the meeting must wait until you authorize him or her to join the meeting.
If you wish, you can enable your registered students to bypass the Waiting Room, and keep it switched on only for guest participants. You can enable the waiting room feature as one of your default settings on Zoom website in advance. Just sign in with your email and password, go to Settings and you’ll find the option there. You can also turn it on by accessing the Zoom Security icon in the menu that appears.
Control the Content That Your Students Share
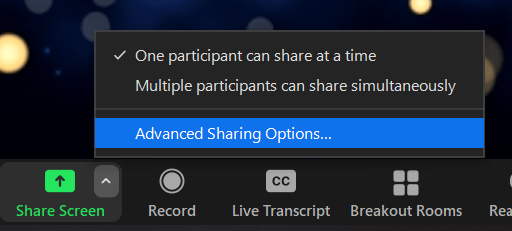
If you sign in to Zoom website with your email address and password, just look for the Annotation option on Settings. This is where you can choose the option “Only the user who is sharing can annotate”, that prevents unwanted notes whenever you or other participants share screen. When the meeting starts, click on the arrow right by the Share Screen icon, and press Advanced Sharing Options. On the pop up, go to “Who can share?” and choose “Only host”.
Stop Student Chatting
In the physical classroom, student chatting often disrupts classroom learning. The same can be said about virtual chatting. If you want, you can prevent students from using the chat feature to talk with one another. Simply go to Zoom’s Security icon and remove the chat authorization. By doing so, the students will still be able to use the chat feature to communicate with you.
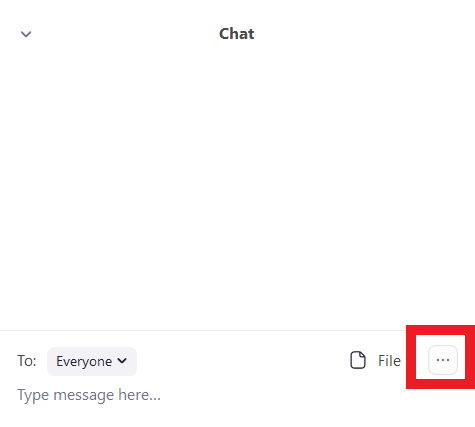
If you want, you can also go to the Chat icon, press the three dots on the pop up, and choose your favorite chat option. You can select the “No One” option and avoid the chat altogether. You can also select the “Host Only” option.
Remove Unwanted Disruption
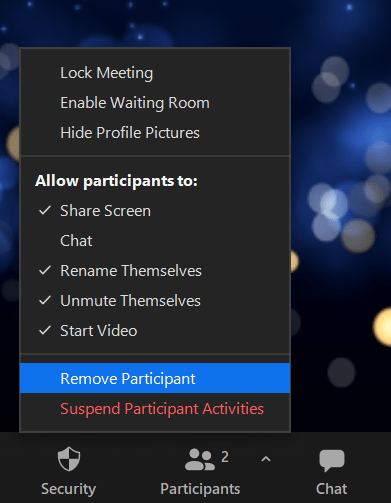
As an academic teacher, disruption is the last thing you should put up with. If one of your students disrupts your classroom, or if an unwanted user enters your class, you can easily remove them. Click on Zoom’s Security icon and scroll down to the “Remove Participant” option. You will then be given a list of user names to choose from.
BTW, if you don’t want to remove a certain user, you have other options. As the classroom host, you can always mute their audio or disable their video.
Report a Specific User
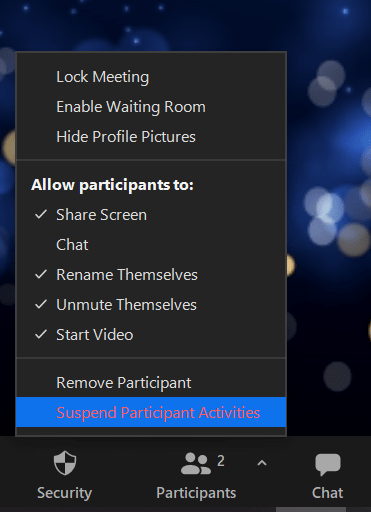
Zoom’s recent option, Suspend Participant Activities, can be even better in that case. By choosing this option on the bottom of the security menu, every participant’s activity just stops, and this is the perfect opportunity for you to take care of trolls, hackers or participants who don’t behave themselves. After doing so, you can just go back to normal and carry on with your class.
Don't Neglect the Zoom Security Icon
It’s there for a reason! Zoom invests a great deal in security. As you and your fellow university lecturers wait for the world to enter the Post-COVID era, you rely on Zoom to teach your curriculum in optimal fashion. With advanced Zoom security, there is no need for you to compromise your classroom’s security and orderly conduct. After all, you deserve to teach without thinking about anything except the course material.
We recommend that you use your Zoom settings to optimize your class scheduling and registration. As for the rest, simply click on the Zoom Security icon. Security has never been this simple.
Naotech shares Zoom’s belief that ease of use and a high security level don’t contradict each other. That’s one of the reasons why Naotech chose to become Zoom’s reseller partner back in 2015. Naotech clients are welcome to contact our team whenever they need security advice. We are here for you!

